What is ZwDeleteAtom[99]?

ZwDeleteAtom[99] is identified as destructive Trojan virus that open backdoor on infected PC to help more adware and malware enter the system without permission. Once ZwDeleteAtom[99] lands on your PC, it acts as malware installer to mess up entire system. After you launch system, ZwDeleteAtom[99] connects Internet at the background to communicate with remote server, and then various advertising-support applications will be downloaded and setup silently. Your web browsers such as IE, Chrome and Firefox will be infected by numerous nasty extensions which are responsible for generating endless commercial ads. After that, you will be having difficult time while surfing the web since all your browsing will be interrupted with tons of banner ads, text ads and popups ads. In short, ZwDeleteAtom[99] is a source of malware, thus you need to get rid of it as quickly as you can.
How Is ZwDeleteAtom[99] Distributed? How to Avoid Similar Threats?
ZwDeleteAtom[99] is mainly spread through free download files shared on some suspicious websites. When you try to download a torrent file or free software provided by file sharing networks, ZwDeleteAtom[99] and other infections can take chances to infiltrate your system. Especially when you run Installer of those freeware, all kinds of PUPs will be added to your PC without your knowledge if you often use Typical Installation and do not review all agreement and details in the process. Besides, when you open attachments or click links of spam email and visit pornography sites, PC infections can invade your system as well.
To avoid invasions of PC threats like ZwDeleteAtom[99], you should keep these tips in your mind:
- Always select Custom Installation while installing software, and do not skip any step so that you have a chance to cancel unwanted options or stop unwanted changes.
- Scan every email attachment before you open it, and it’s best not to open the suspicious attachments if you cannot be so sure that email is a real email sent by someone you know.
- Do not visit pornography sites or download related contents shared on some forums.
If your PC have been infected by ZwDeleteAtom[99], you need to deeply check your PC now and find and remove all the malware related with it, or your personal files, information and accounts will be at risk because it helps remote attacker hack your PC or accounts. Before those big trouble happens to you, follow the steps below to get rid of it now:
Step 1 - Uninstall ZwDeleteAtom[99] From Win 10 /Win 8/Win 7/Vista/XP
Open Control Panel On Windows 10
- Click Start Menu >> click Settings
- Double-click System
- Click Apps & features >> Select ZwDeleteAtom[99] or related harmful program >> Click Uninstall when the button appears
Open Control Panel On Win 8
- Click the File Explorer icon on the bottom left corner of desktop to open Libraries window.
- Click Desktop in right side bar >> double click Control Panel
Open Control Panel On Windows 7/Vista/XP
- Click Start Menu >> Click Control Panel
Removal Of ZwDeleteAtom[99] From Control Panel
- In Control Panel, click Uninstall a program
- Click Installed On tab to find out ZwDeleteAtom[99] and unwanted programs >> Click Uninstall button after selecting a program
Step 2 - Clear up malicious files of ZwDeleteAtom[99] in Registry
- Press Windows + R keys at the same time to open Run window
- Type regedit and click OK :
- Locate and clear up the malicious registry files of ZwDeleteAtom[99] virus:
HKEY_LOCAL_MACHINESOFTWAREMicrosoftWindowsCurrentVersionpoliciessystem “DisableTaskMgr” = ‘1'
HKEY_CURRENT_USER\Software\Microsoft\Windows\CurrentVersion\Uninstall\[virus name]
HKCU\SOFTWARE\Microsoft\Windows\CurrentVersion\Policies\Explorer\DisallowRun
HKEY_CURRENT_USERSoftwareMicrosoftInternet ExplorerDownload “CheckExeSignatures” = ‘no’
HKEY_CURRENT_USERSoftwareMicrosoftInternet ExplorerMain “Default_Page_URL”
HKEY_CURRENT_USERSoftwareMicrosoftWindowsCurrentVersionExplorerAdvanced “ShowSuperHidden” = 0'
HKEY_LOCAL_MACHINE\SOFTWARE\Wow6432Node\Microsoft\Tracing\Muvic_RASAPI32
HKCU\SOFTWARE\MICROSOFT\WINDOWS\CURRENTVERSION\EXT\SETTINGS\{RANDOM}

Reset your homepage page To Remove ZwDeleteAtom[99] Virus
Reset Microsoft Edge Browser
- Select More (…) on the address bar, then Settings
- Under Open with, select A specific page or pages
- select Custom to enter the URL of page you want to set as homepage
Reset IE Browser
- Open Internet Explorer.
- Click the Tools button, and then click Manage add-ons.
- Click Toolbar and Extensions, then select ZwDeleteAtom[99] and related extensions and click Disable
Reset Firefox Browser
- Click the menu button and choose Add-ons to open Manager tab
- In the Add-ons Manager tab, select the Extensions or Appearance panel.
- Select the ZwDeleteAtom[99] and related add-on you need to remove.
- Click the Remove button.
Reset Chrome Browser
- Click the hamburger menu icon on the Google Chrome toolbar and then More tools.
- Select More tools from the menu.
- Select Extensions from the side menu
- Click the trash can icon link next to ZwDeleteAtom[99] extension or related extension you wish to remove.
Download Automatic ZwDeleteAtom[99] Removal Tool
If you are not able to remove ZwDeleteAtom[99] virus manually from your computer system or you are getting any problem in removing this threat from your PC then you are advised to use Automatic Removal Tool. it is an advanced and powerful malware removal tool that can easily delete all kind of harmful threats and malware from your system. You can download the trial version of this tool to detect ZwDeleteAtom[99] virus on your PC. Once you feel satisfied with the detection then you can purchase this program to remove the threat permanently.
How To Remove ZwDeleteAtom[99] With Automatic Removal Tool
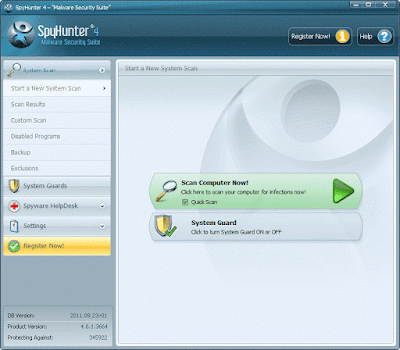
Step 1 - Install the software on your computer and click scan computer now button
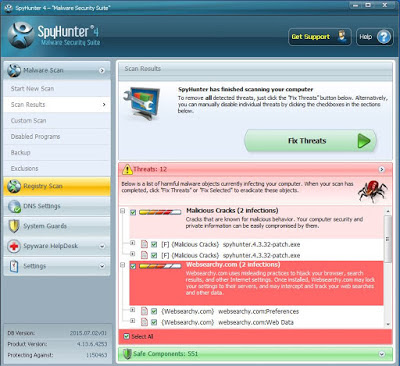
Step 2 - Click on Fix Threats Now to remove all detected viruses or malware.
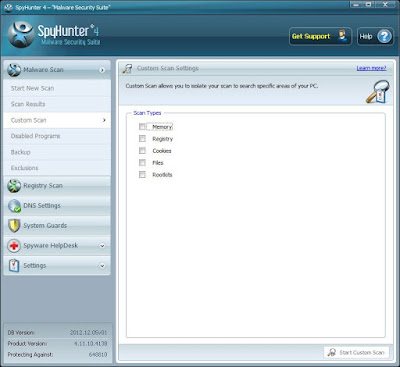
Step 3 - Use Custom Scan feature to scan any specific part of computer.
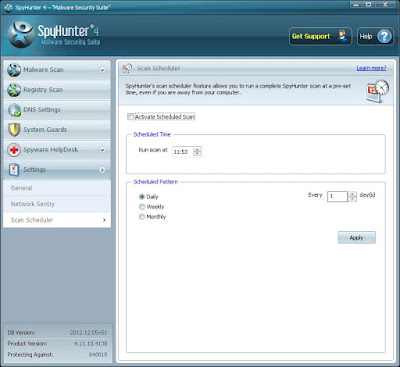
Step 4 - Configure Scan Scheduler option to ensure the safety of your PC.
No comments:
Post a Comment